
With the New Widget Settings Screen in WordPress 5.8, you can now add any type of available blocks in any of the widgetized areas in your website. You can choose from the following block categories:
- Text
- Media
- Widgets
- Design
- Theme
- Embeds
The new widget settings screen will show all of your available widgetized areas. The number of widgetized areas, as you know, depends on your theme.
During your first time using the new widget screen, you will be given a quick walk-through, as shown in the screenshots below.

The welcome message informs you of the number of “block” areas your theme provides. In each block area, you can add whatever block (including widgets) you like.
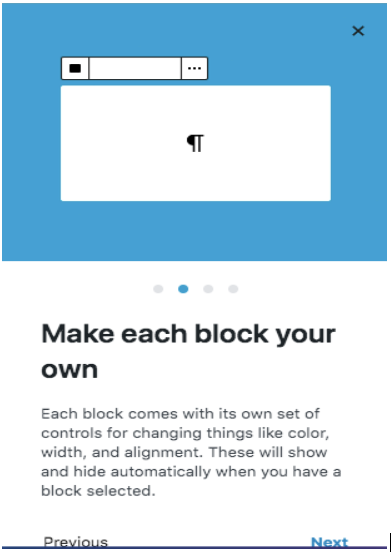
You can control each block’s color, width, alignment, etc. This set of controls shows and hides automatically upon selecting a block.
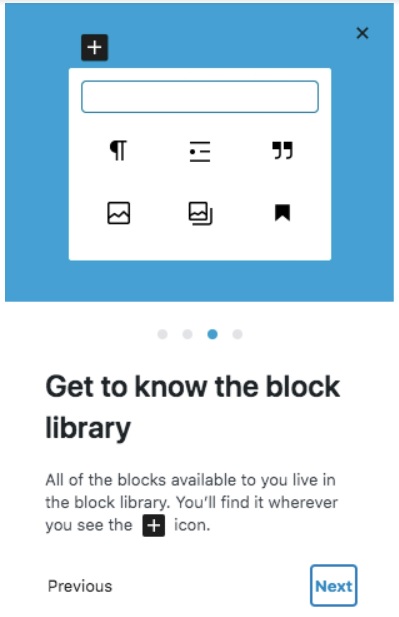
The + icon found at the upper left corner of the screen and at the bottom of each block area leads to the block library — a full collection of available blocks.
Take these Steps to Add a Block/Widget with the New Widget Settings
-
- Go to Dashboard >> Appearance >> Widgets.
- Click the + icon at the upper left corner or at the bottom of each block area.
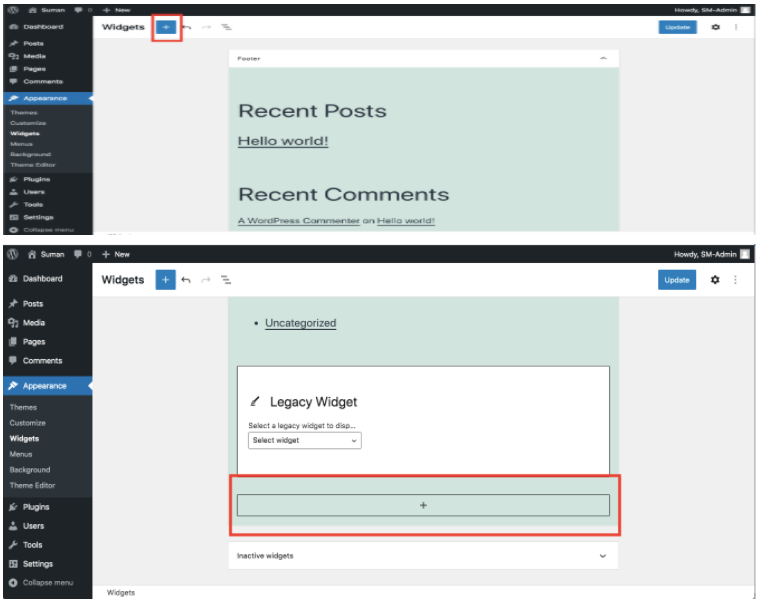
- Click on the block that you want to add and it will be placed instantly at the block area.
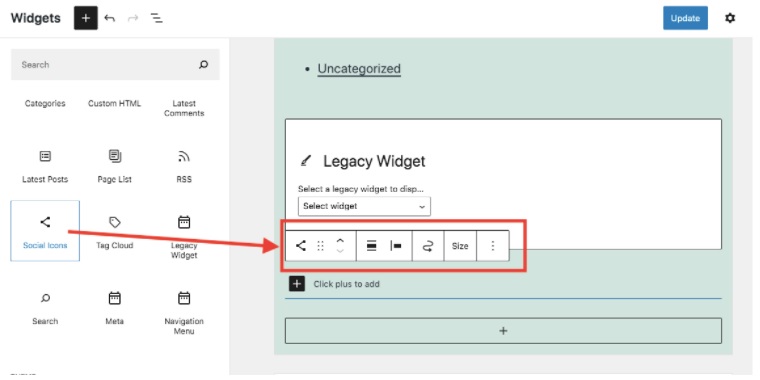
Here, we have added the Social Icons widget. (There is a + button to add as many available social icons as you like.) - Depending on the type of block, you can control alignment, justification, size, and more. Plus, you can move the block to another widget area, if there is any.

To reiterate, the new widget settings screen extends the limit as to what content you can add in your widgetized areas, such as the footers and sidebars. It extends the functionality of these important areas. We can add more engaging content to every corner of our pages and posts.
Of course, whatever we put in the widget areas, we still want to take control of visibility and styling, among other things. Thus, thanks to Widget Options, we can still do so, with the help of the Classic Widgets plugin.
Widget Options Can Control Any Block!
You might be wondering whether it is just the widget blocks that can be managed and controlled by Widget Options. The good news is all types of blocks you put in the widgetized areas are turned into html code snippets, and Widget Options can work with them.
Here’s how it works:
Say, you want to add a design element — a spacer, for example — in the footer area. You must deactivate the Classic Widgets plugin and go to the Widget screen (Dashboard >> Appearance >> Widgets).
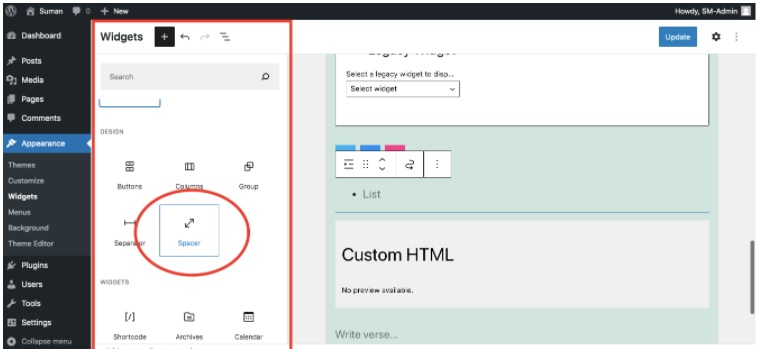
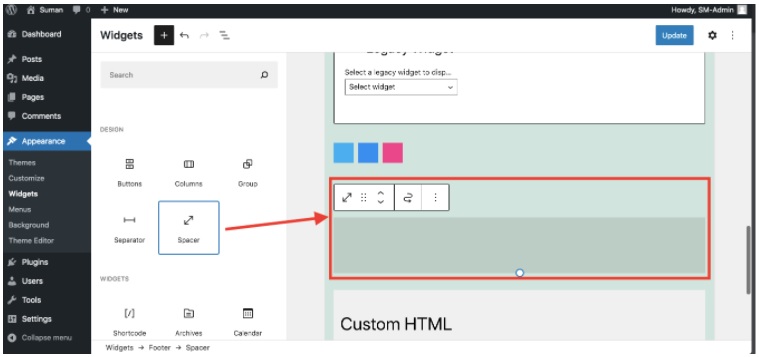
When you click the spacer button, this element will be instantly added to the footer.
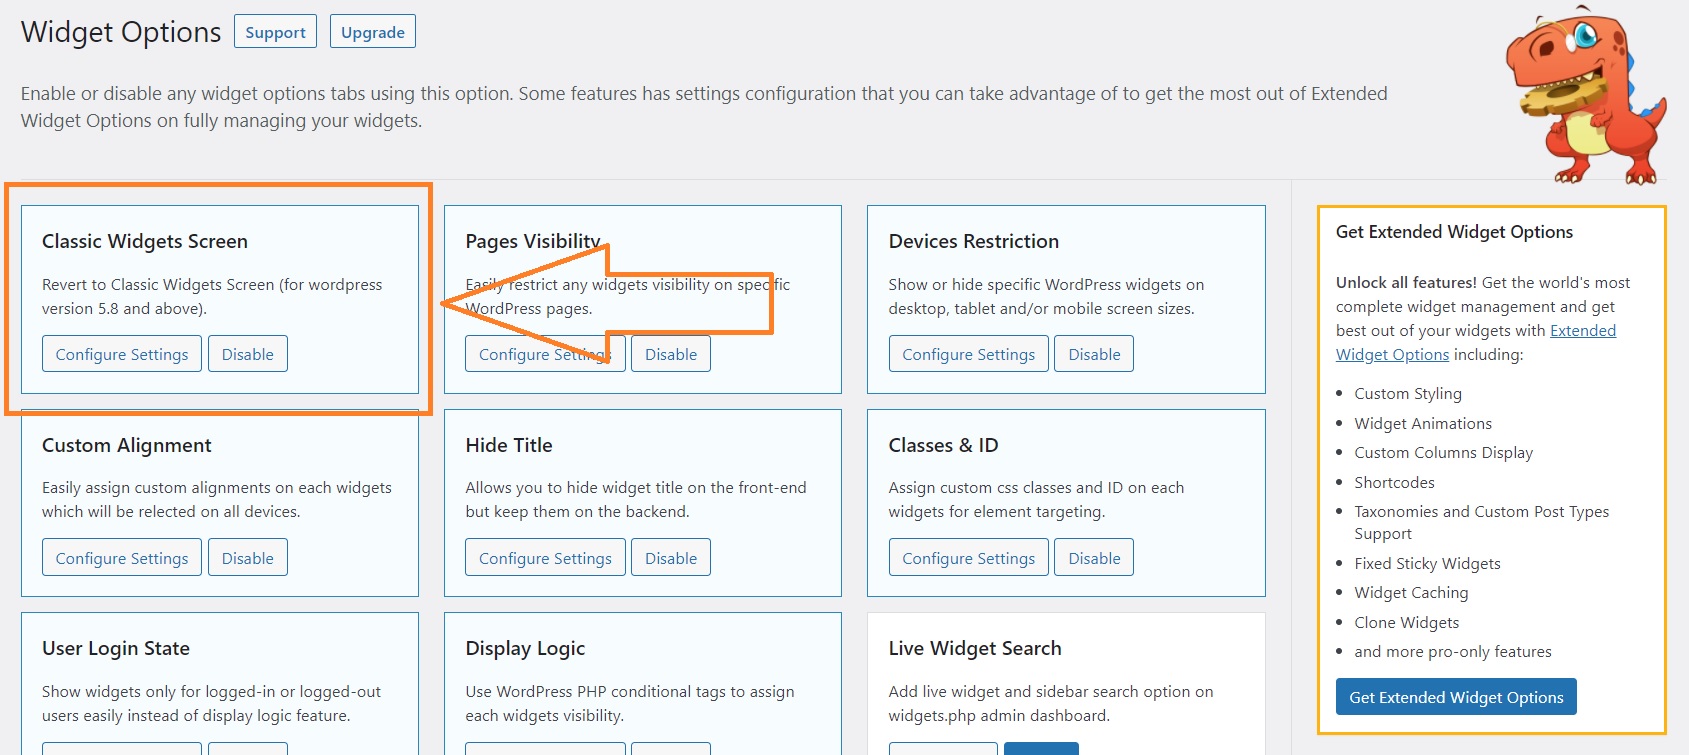
Here is an easy way to keep using Widget Options:
- Make sure to update Widget Options plugin to it’s latest version 3.7.9 or Widget Options Extended to it’s latest version 4.6.7.
- Navigate to Widget Options settings (Dashboard > Settings > Widget Options) and enable Classic Widgets Screen.
A quick walkthrough to the New Gutenberg block-based widgets screen
And… you’re back to the widgets screen that we all are most familiar with!
Thanks for reading! We are excited about the many changes that WordPress 5.8 will bring and we hope you are, too! With this new version, we are happy that Widget Options will continue to give you full control over your widget area blocks!