Completely Control/Manage your WordPress Widgets
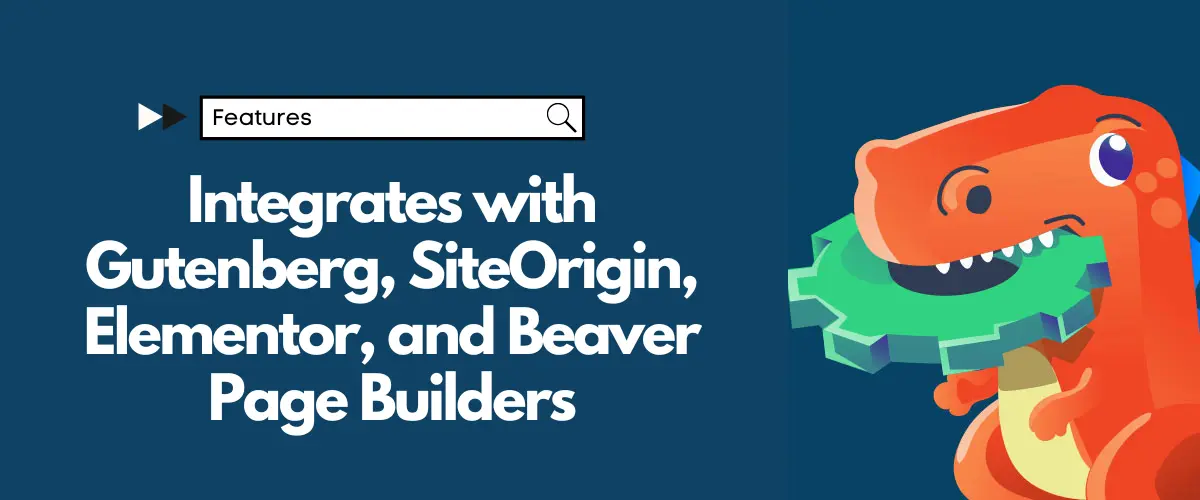
Get Started with Widget Options NowExtended Widget Options – the all-in-one widget management plugin for WordPress – not only lets you take full control of your site’s widgets in the sidebar, header, and footer; it also extends its functionality to all of your pages built with the three most popular page builders in WordPress today — Gutenberg, SiteOrigin, Beaver Builder, and Elementor.
Page builders allow you to create pages with column or grid-based layouts wherein you can add widgets or modules in the main content area besides the common widgetized sidebars and footers. As mentioned, Extended Widget Options controls those elements’ functionality, appearance, and visibility.
Whichever page builder you choose – SiteOrigin, Elementor, or Beaver Builder – you can rely on Extended Widget Options to give you full control over your widgets without leaving the page and with no coding work. With any of the three page builders, you can enjoy the following Widget Options’ key features and more:
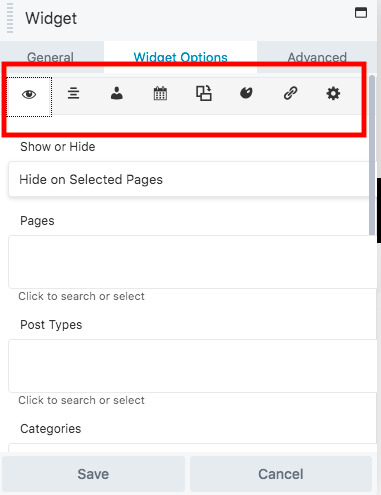
- Show or Hide WordPress Widgets on Specific Devices
- Assign Custom Widget Alignment
- Restrict WordPress Widgets by User Roles
- Easily Hide Widgets on Specific WordPress Pages
- Custom WordPress Widget Styling
- Restrict WordPress Widgets by Day or by Date Range
- Display Widget Logic
How to Enable Page Builder Integrations on the Extended Widget Options Plugin:
PageBuilder by SiteOrigin
Page Builder by SiteOrigin features a drag-and-drop page layout builder and allows the use of all WordPress widgets plus a bundle of its own widgets in your page’s main content areas. You can download the plugin here.
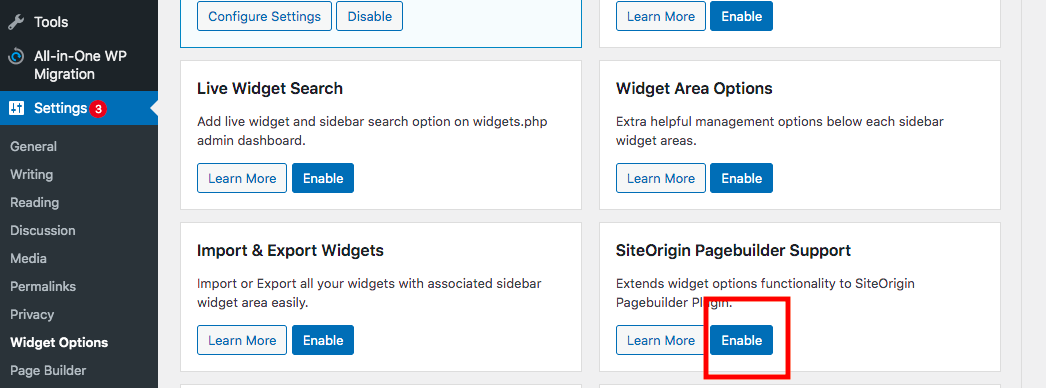
All you have to do to enable integration with SiteOrigin is go to the Dashboard > Settings > Widget Options and enable
SiteOrigin Page Builder Support.
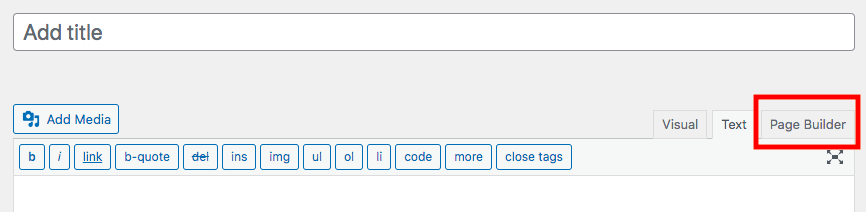
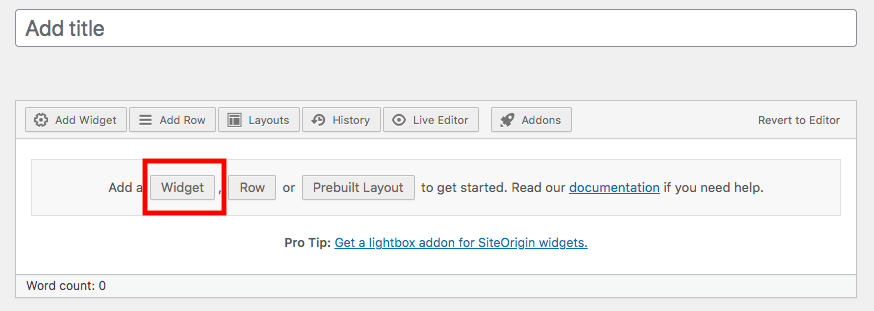
If the Page Builder by SiteOrigin plugin is installed, you will notice the page builder tab in your page editor, as seen on the image below.
When you choose the Page Builder tab, you will find options to add widget, row, or prebuilt layout.
Upon clicking on the Widget button, you will be directed to a list of all WordPress widgets available.
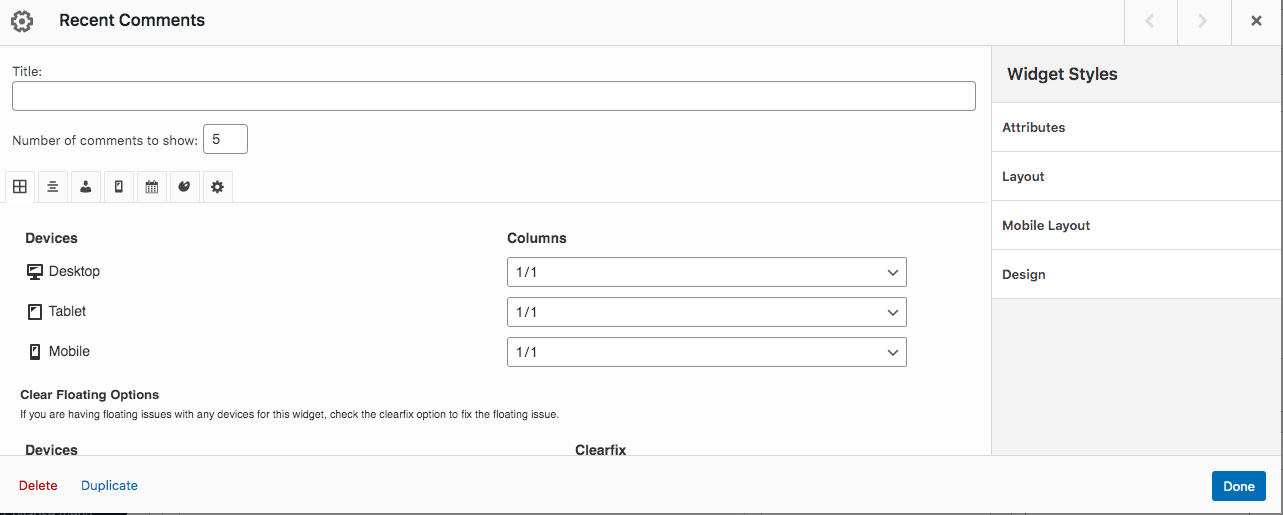
For example, we can choose to add the Recent Comments widget. Upon choosing the widget, the settings page will pop-up, wherein you can create a title and make adjustments to widget styles.
The title, attributes, layouts, and design will show in the content area. But you can make further customization to the widgets using Extended Widget Options.
Now that the SiteOrigin Page Builder Support is enabled, the Widget Options menu should appear on the widget’s settings page and we can begin editing. 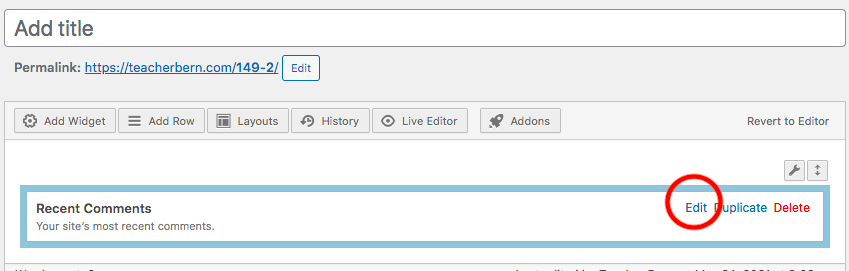
Upon clicking the Edit link, you will be brought back to the settings page. Notice that Widget Options settings have been added to the menu. Now you can control the widget’s column width, alignment, visibility, style, and more!
Elementor Website Builder
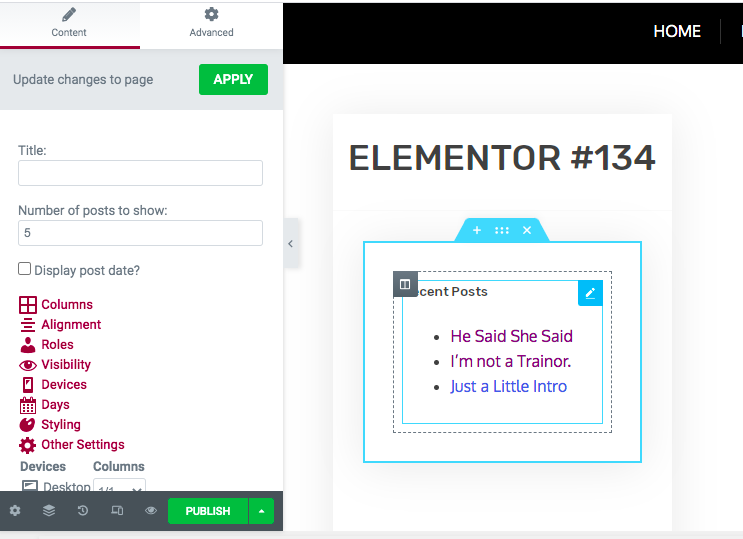
Elementor is a web design platform that lets you create landing pages, design a blog, and build your e-commerce site. It is free to download here. Just like in SiteOrigin page builder, Widget Options functions are integrated into every widget’s settings menu that’s accessible from the layout page, so you can manage the widget’s visibility, appearance, style, column settings, alignment, etc., directly from the page editor.
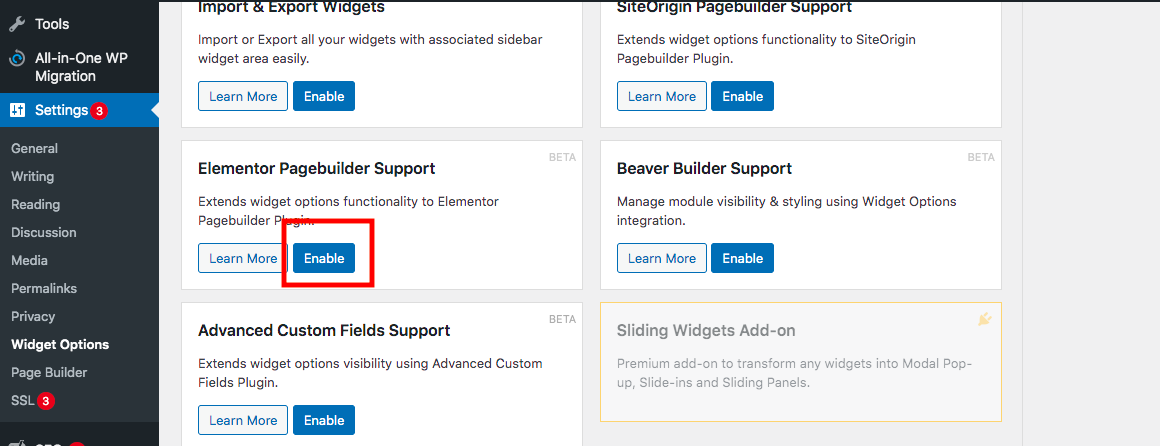
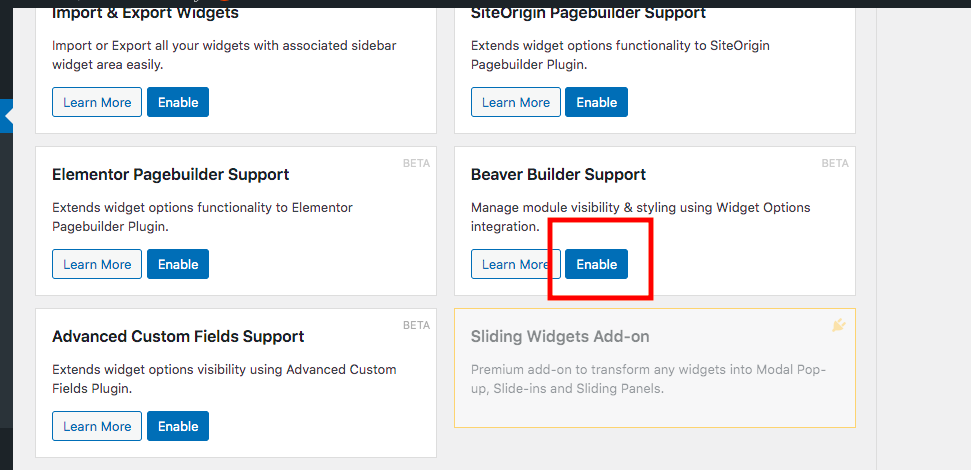
For these functions to take effect, make sure you go to Dashboard > Settings > Widget Options and enable Elementor Pagebuilder Support.
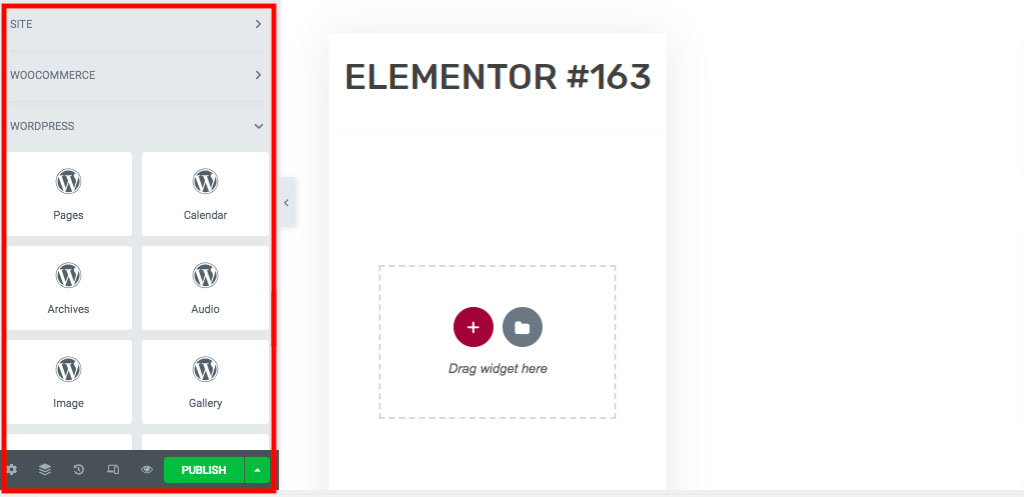
When editing a page in Elementor, you will find elements in the left sidebar (including WordPress widgets) that you can drag-and-drop into the content area.
In the screenshot below, we’ve added the Recent Posts widget to show how Extended Widget Options functions are included in the settings menu.
Beaver Builder
Beaver Builder is also a drag-and-drop design platform that not only lets you place WordPress widgets, but also standard modules in the content areas. Beaver integrates Extended Widget Options into both its standard modules’ and WordPress widgets’ settings menu. You can download the Beaver Builder plugin here.
After adding Beaver Builder plugin, don’t forget to go to Dashboard > Settings > Widget Options to enable Beaver Builder Support.
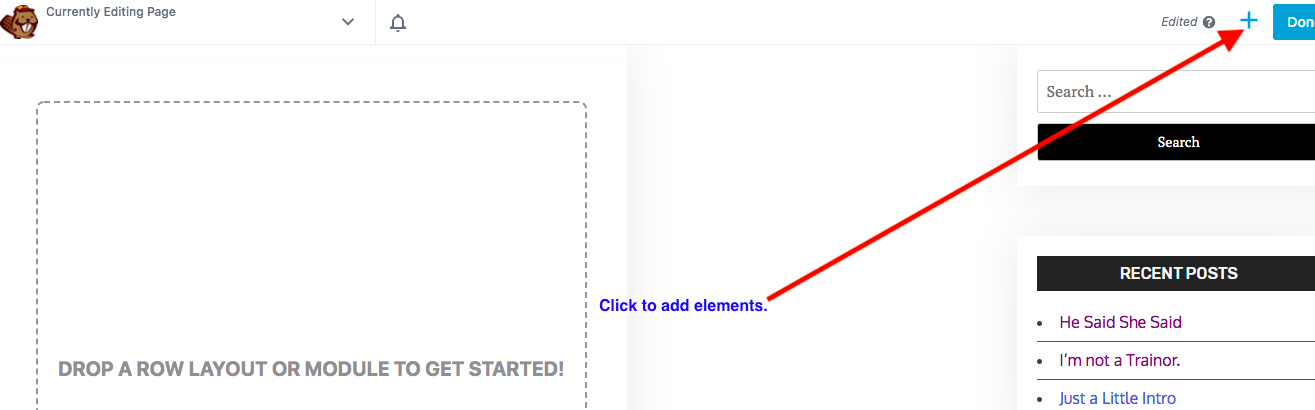
When building a page, click on the Launch Beaver Builder button to get started with the platform.
You can begin adding elements into the page by clicking on the + on the top right-hand corner of the page. Among the elements you can add are WP widgets and standard modules.
Since Beaver Builder support is enabled, you will notice that Widget Options features are added into the settings.