If you need to add custom WordPress widget CSS classes and ID, you don’t need another plugin. It’s because Widget Options has such function. In addition, you can use this feature for javascript purposes. Also, Widget Options lets you add predefined classes you can choose from. Absolutely no need for any coding functions and filters.
Adding custom widget CSS classes and ID is oftentimes a must. This is true when you want to achieve certain theme functionality. This could mean another plugin to install or some coding work. But thanks to Widget Options you don’t need to do any of these.
The Widget Classes and ID feature is available in both the free and premium versions of Widget Options. Download now and start to enjoy this and many other features.
Here’s how to add custom WordPress widget CSS classes and ID.
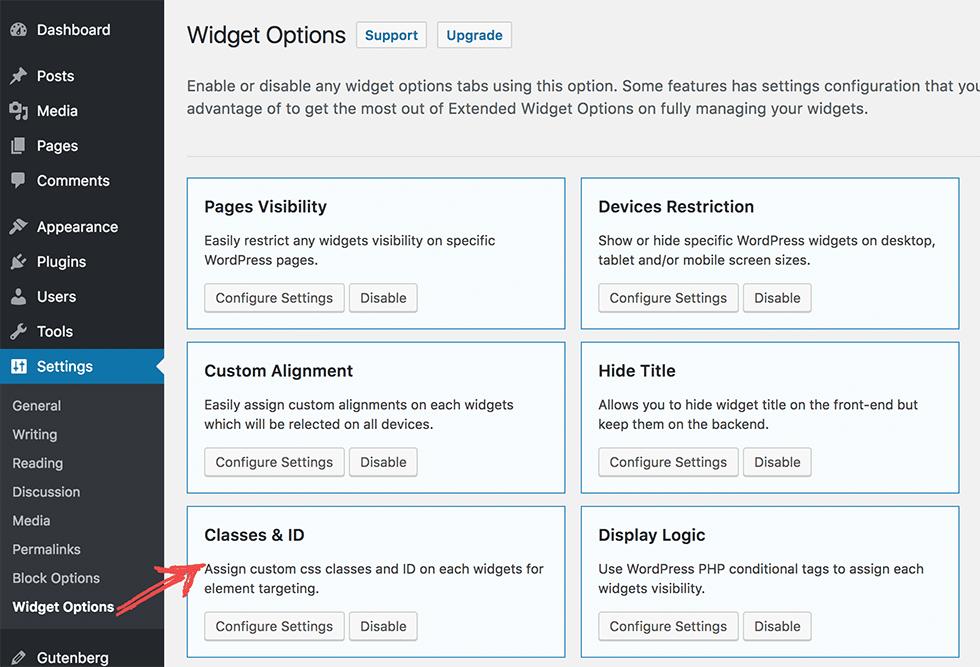
- Upon activating the plugin, go to Settings >> Widget Options and enable the Classes & ID feature.
- Click the “Configure Settings” button. Check box next to Enable ID Field to allow users to add custom ID on each widget.

- Set a class list that you want to be available as pre-choices on the Class/ID Widget Options tab.
- Click Save.
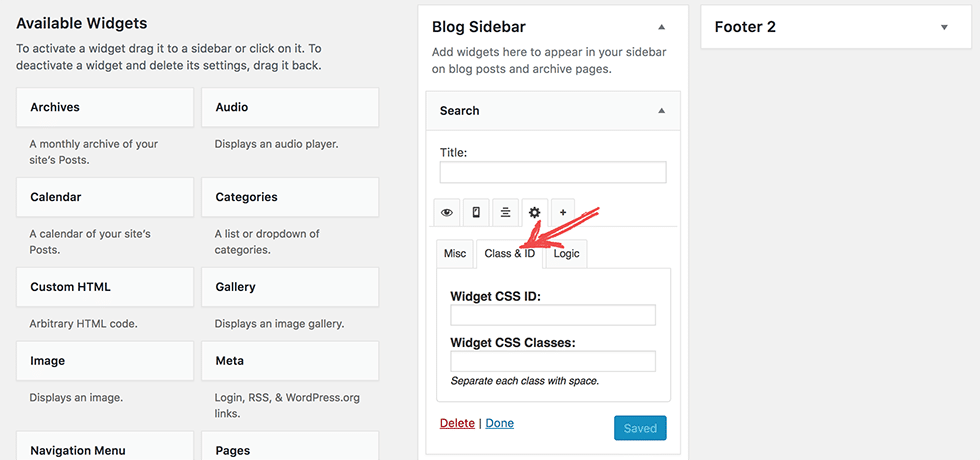
- You should be able to add CSS classes and ID and see the list you have created when you go to to Appearance >> Widgets.
- From the list of active widgets, find the one you want to customize. Click it to reveal the options.
- Click the Settings tab (gear icon);
- Go to the Classes & ID tab.

- Key in your Widget CSS ID and classes on the designated fields and tick your options from the list available widget classes.
- Don’t forget to hit the Save button.
Quite simple, right? Go ahead and try it out yourself. You can also learn how to add custom widget CSS classes and ID by watching the video below. You can download Widget Options for free on the WordPress plugin directory.
